DIY Castor Oil Leave-In Hair Conditioner for Dry, Frizzy & Damaged Hair
Dryness, frizz, and breakage don’t stand a chance against this DIY castor oil leave-in conditioner. Rich in fatty acids and vitamin E, castor oil deeply hydrates, strengthens roots, promotes healthier growth, and restores shine. Perfect for everyday care or protective styles, it keeps hair soft, smooth, and manageable without leaving a greasy residue. Let’s take a look at the benefits of the ingredients used in DIY castor oil leave-in conditioner.
Get this recipe/post delivered to your inbox 📩
Busy right now? I’ll send this straight to your inbox so it’s waiting for you later. Read it anytime — no searching for it again.
Benefits of DIY Castor Oil Leave-in Conditioner
1. Shea Butter
- Comedogenic Rating – 0-1
- Absorption Rating – slow
- Deeply moisturizes hair, coats strands to smooth cuticles, and reduces frizz.
- Strengthens hair and improves elasticity, preventing brittle ends.
- Nourishes the scalp, reduces inflammation, and promotes a healthy environment for growth.
- Rich in vitamins A and E, and essential fatty acids that protect and repair damaged hair.
2. Cocoa Butter
- Comedogenic Rating – 2-3
- Absorption Rating – very slow
- Adds softness and hydration, making hair manageable and silky.
- Creates a protective barrier to minimize protein loss and prevent split ends.
- Encourages healthier hair growth by keeping strands strong and resilient.
- Contains stearic acid, oleic acid, and antioxidants that strengthen hair and fight environmental stress.
3. Almond Oil
- Comedogenic Rating – 2
- Absorption Rating – fast
- Lightweight oil that penetrates easily, softening coarse, dry hair without greasiness.
- Improves strength, reduces breakage, and makes detangling easier.
- High magnesium content supports stronger, faster-growing hair.
- Contains vitamins A, B, D, and E, plus omega-9 fatty acids for nourishment.
4. Castor Oil
- Comedogenic Rating – 1
- Absorption Rating – slow
- Thick, occlusive oil that locks in moisture and tames unruly frizz.
- Strengthens weak strands and prevents further damage.
- Famous for stimulating growth by improving scalp circulation and nourishing follicles.
- Packed with ricinoleic acid, vitamin E, and omega fatty acids for deep conditioning.
5. Camellia Seed Oil
- Comedogenic Rating – 1
- Absorption Rating – very fast
- Lightweight, fast-absorbing oil that adds shine and softness without weighing hair down.
- Strengthens hair cuticles, reducing brittleness and split ends.
- Improves scalp health, which indirectly supports stronger growth.
- Rich in oleic acid, vitamin E, and antioxidants that nourish and protect hair.
6. Vitamin E Oil
- Comedogenic Rating – 2
- Absorption Rating – slow
- Seals in moisture and enhances softness and shine.
- Protects strands from oxidative damage, reducing breakage.
- Improves circulation to the scalp and supports healthier hair follicles.
- A powerful antioxidant that repairs and strengthens hair from root to tip.
7. Sandalwood Essential Oil
- Helps balance scalp oils and smooths rough hair texture.
- Strengthens roots and prevents thinning.
- Improves circulation to follicles, encouraging growth.
- Contains natural antioxidants and soothing compounds for scalp health.
How To Make a DIY Castor Oil Leave-in Hair Conditioner
DIY Castor Oil Leave-in Hair Conditioner
This DIY Castor Oil Leave-In Hair Conditioner combines rich butters and nourishing oils to fight dryness, frizz, and breakage. Packed with vitamins, antioxidants, and fatty acids, it strengthens hair, promotes growth, and leaves strands soft, smooth, and healthy.
Author: Mamta
Recipe type: DIY, Beauty
Recipe Category: Leave-in Hair Conditioner
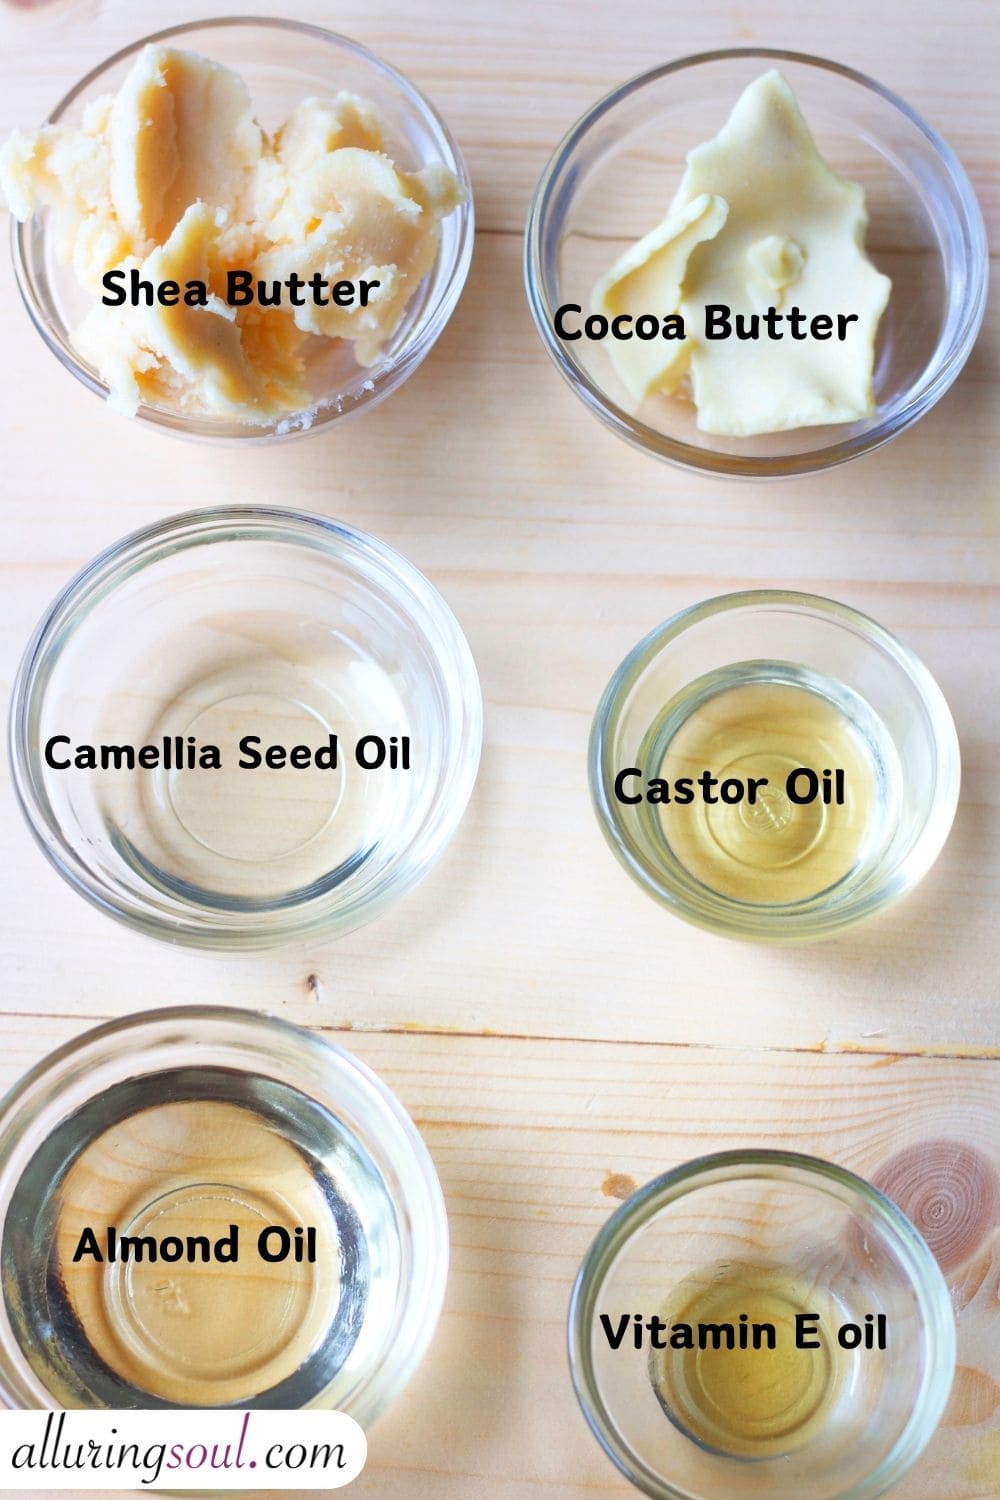
Ingredients
Heated Oil Phase
- 40g Shea Butter
- 20g Cocoa Butter
- 10g Almond Oil
- 9g Castor Oil
- 20g Camellia Seed Oil
Cool Down Phase
- 0.5g Vitamin E Oil
- 0.5g Sandalwood Essential Oil
TOTAL = 100 grams
Instructions
- Fill a pot with 1–2 inches of water. Place a heat-safe glass bowl on top, ensuring it doesn’t touch the water.
- Add shea butter and cocoa butter to the bowl. Gently melt over low heat, stirring occasionally until smooth.
- Once melted, remove from heat. Add almond oil, castor oil, and camellia seed oil. Stir to combine.
- Let the mixture cool slightly until it begins to thicken but is not solid, around room temperature or cooler. Or you can keep it in the refrigerator for about 30-40 minutes until the mixture becomes soft, thick, and opaque.
- Use a hand mixer or stand mixer to whip the mixture for 5–7 minutes until fluffy and creamy.
- Now, add cool-down phase ingredients. Whip again briefly to incorporate.
- Spoon into a clean, airtight container. Store in a cool, dry place.
How To Apply
- Fine/medium hair: Rub a pea-size amount between palms; apply sparingly to damp or dry mid-lengths & ends.
- Thick/curly/coily: Use a marble-size; scrunch into damp or dry curls or smooth over protective styles.
- Add more only if needed—it’s concentrated.
Notes
1. No preservative needed (anhydrous), but keep water out of the jar.
2. Vitamin E is an antioxidant—helps delay rancidity.
3. Shelf life: ~6–12 months in a cool, dark place.
4. Patch test before first use; keep essential oils away from eyes; reduce EO to 0.3–0.5% for very sensitive scalps.
2. Vitamin E is an antioxidant—helps delay rancidity.
3. Shelf life: ~6–12 months in a cool, dark place.
4. Patch test before first use; keep essential oils away from eyes; reduce EO to 0.3–0.5% for very sensitive scalps.
Frequently Asked Questions (FAQs)
| Question | Answer |
|---|---|
| 1. Can I use this leave-in conditioner every day? | Yes, but use a small amount to avoid buildup. Fine hair may need it 2–3 times a week, while curly/coily hair may benefit daily. |
| 2. Will castor oil make my hair greasy? | Castor oil is heavy, but in this whipped blend it’s balanced with lighter oils like camellia and almond. Apply sparingly, focusing on ends. |
| 3. Can I use this conditioner on my scalp? | Yes, but in moderation. Castor oil supports scalp health, but overuse may clog pores in oily or sensitive scalps. |
| 4. Do I need a preservative in this recipe? | No, because it’s an anhydrous (oil-only) formula. Just keep water out of the jar and store in a cool, dry place. |
| 5. How long does it last? | With Vitamin E as an antioxidant, shelf life is 6–12 months if stored properly in a cool, dark place. |
| 6. Can I replace castor oil with another oil? | You can substitute with jojoba or argan oil for a lighter texture, but castor oil is key for growth and breakage repair. |
| 7. Is this recipe safe for kids? | Yes, if you reduce or skip the essential oil (sandalwood). Always do a patch test first. |
| 8. Can I add fragrance oils instead of essential oils? | Yes, but ensure they’re skin-safe, cosmetic-grade, and used within recommended rates (0.3–1%). |
| 9. Why do I need to whip the mixture? | Whipping incorporates air, making the butter light and fluffy. It spreads easily and prevents a hard, waxy texture. |
| 10. My butter turned grainy—what happened? | Shea and cocoa butters crystallize if cooled too slowly. Next time, cool quickly in the fridge to the “slushy” stage before whipping. |
| 11. Can I heat style after applying this? | It’s not a heat protectant. Apply before air drying or after styling to smooth and seal moisture. |
| 12. Does this help with hair growth? | Castor oil may improve scalp circulation and reduce breakage, which can support healthier, longer-looking hair over time. |
| 13. Why is my leave-in conditioner liquidy? | If it’s too runny, it may be because the ratio of oils to butters is too high, or it wasn’t whipped enough. Try adding a little more butter or chilling before whipping again. |
| 14. Why is my leave-in conditioner hard? | Too much cocoa butter or storing it in a very cool place can make it hard. Let it sit at room temperature or whip in more liquid oil to soften. |