(This post contains affiliate links. You can read my full disclosure here.)
Now that you have your domain name decided its time to get your site set up!
Sometimes you have to spend a little money to get a lot. This is one of those moments. You have to spend some money to set up your blog on Bluehost. There is no way to start making money from your blog without getting the hosting setup. Bluehost provides the best service for the price they are charging.
CAUTION: When setting up your blog, make sure to click on one of the below Bluehost links. This will automatically get you the best pricing available, a free domain URL and also WordPress will be automatically installed for you. Also, note that this is the self-hosted version of WordPress (this is what you need) instead of the WordPress.com version (which you don’t want).
Without any delay, let’s see how to get your Bluehost setup.
Step 1 – Navigate to Bluehost
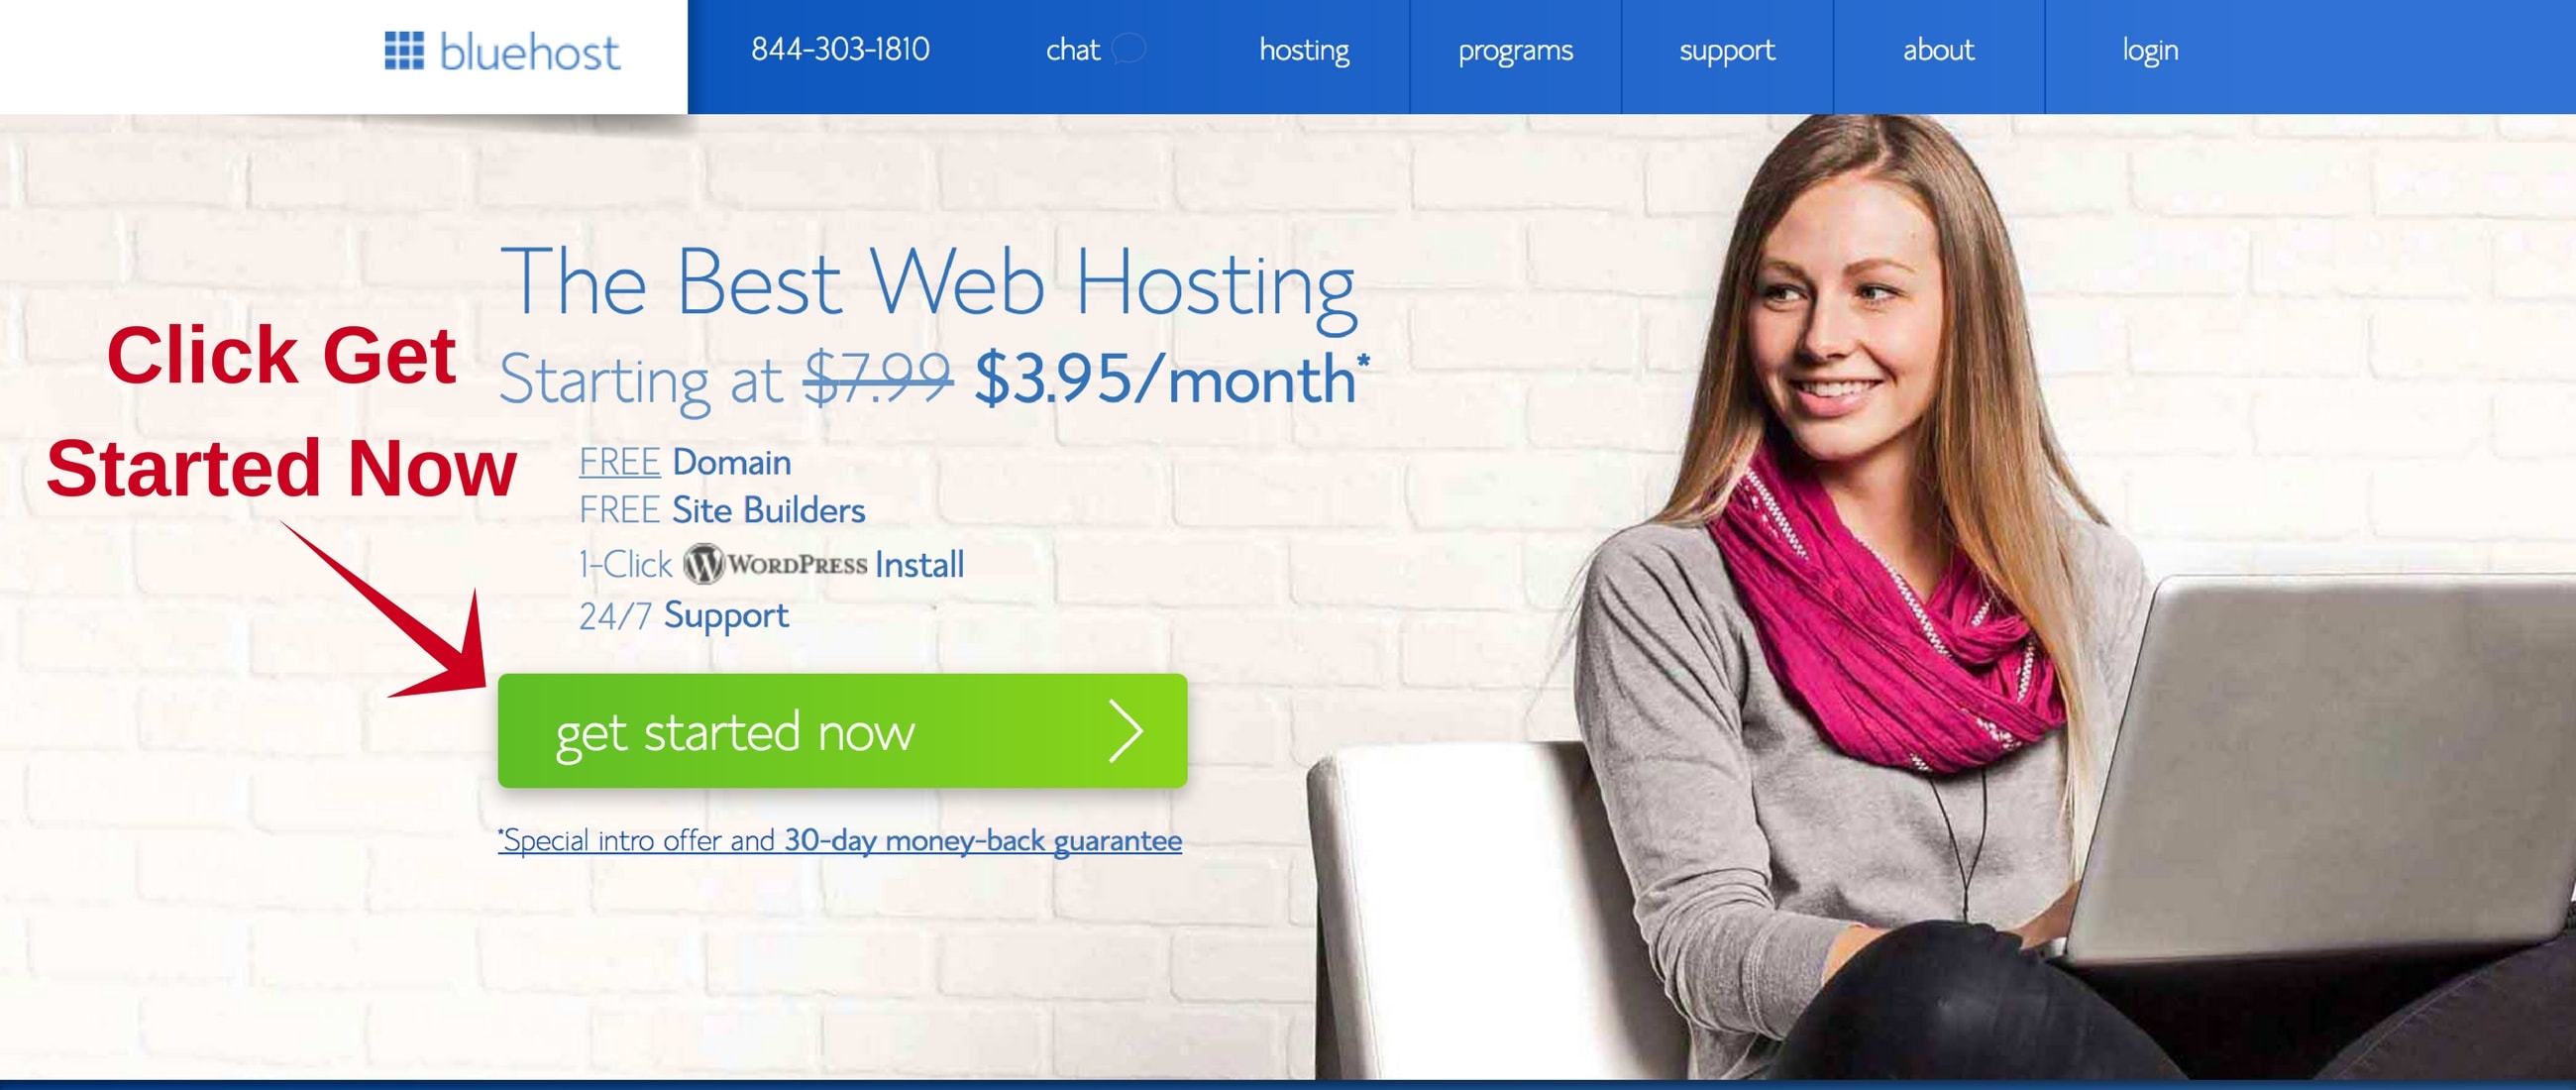
Click on my link here to open Bluehost in a separate window and follow along. This will give you the best pricing available from Bluehost.
Click on the green “Get Started Now” button.
Step 2 – Select Plan
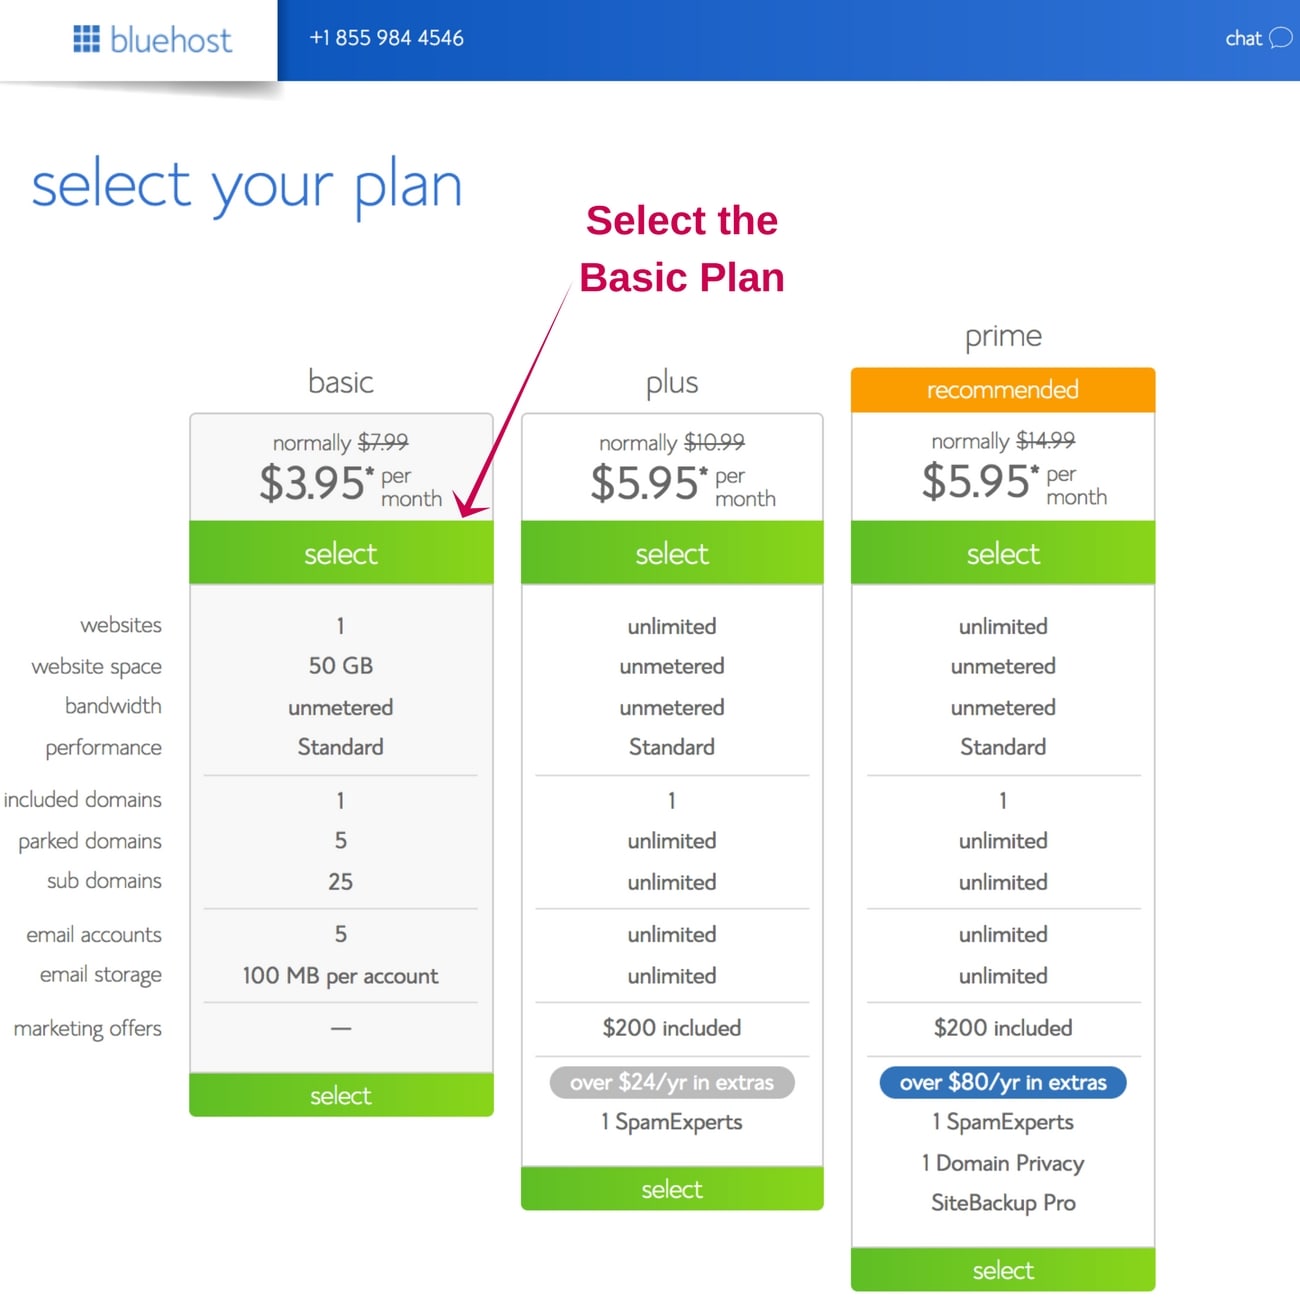
Now you need to select the plan. If you are just starting out then “Basic” plan is best for you. Click on “Select” button under “Basic” plan.
Now you will be asked for the domain name. Enter the domain name which you have decided. Don’t forget that you will get a free domain name. Once done, click “next“.

Step 3 – Enter your account info
Enter your personal information. This includes your account and contact information.

Next, in the package information section, you will be selecting the package you would like to buy.
You can select a 36 months package which gives you the cheapest monthly rate + a free domain name.
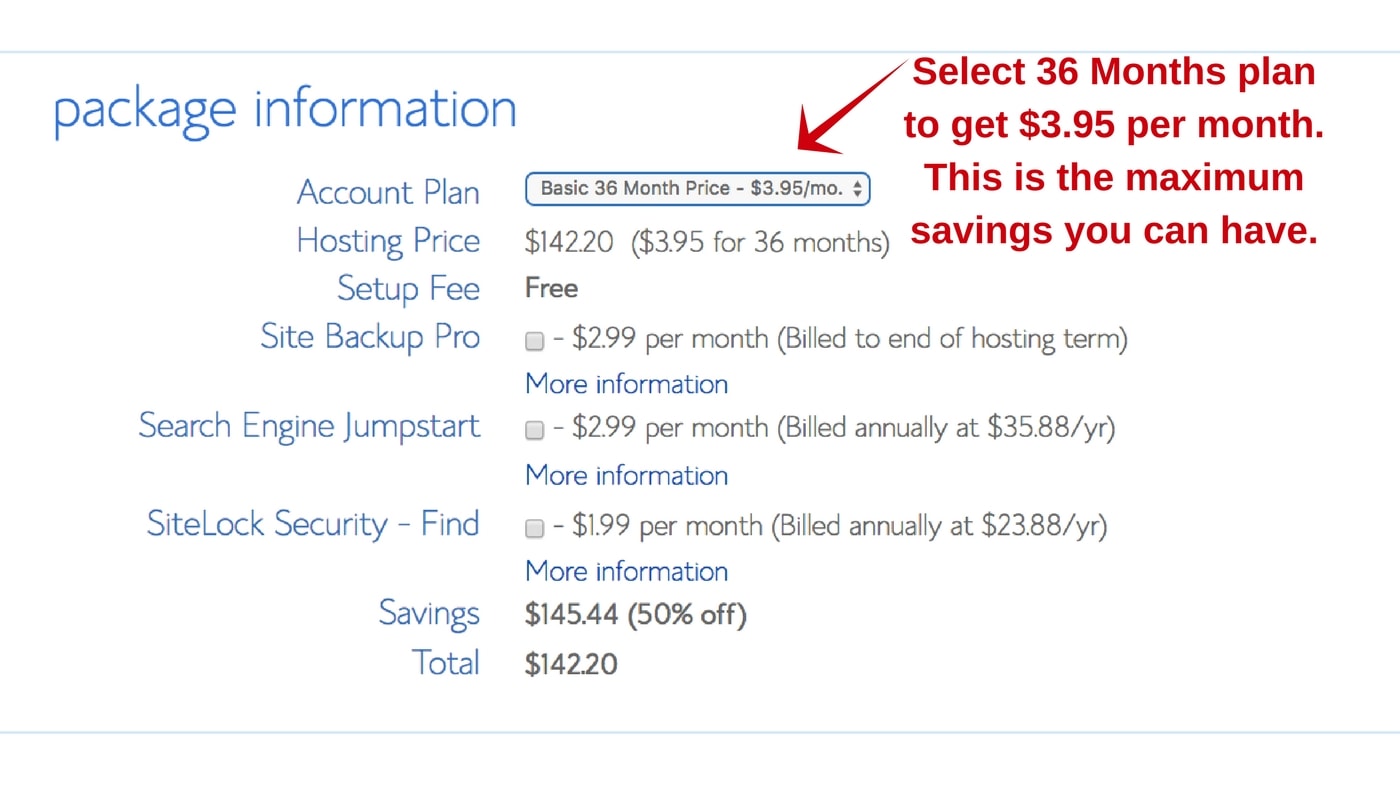
You will be paying for the 36 months upfront and that’s why you are getting such a great deal from Bluehost, but you can cancel your plan anytime in the future to get back your money. Thus there is no risk of losing your money. Also with this plan, you don’t have to bother about paying the rent each month, just pay once and forget it!
There are other services which you can uncheck for now as you can buy them later as well if you want to. I don’t think they are required when you are just starting out.
Step 4 – Enter your billing info
Next, enter your billing information. Agree to the terms of service and then click “submit” button.

Step 5 – Skip the upgrades and special deals
You don’t need to buy anything else here as again you can buy them later if you need it. So you can skip the offers and special deals if you like.
Step 6 – Choose your password
Now you need to create a password. Click on the “create your password” button. This password will allow you to login to Bluehost and get started.

Your screen might be a little different but that fine. Bluehost keeps making changes to its website to provide a much better user experience to its customers.
Step 7 – Install WordPress
Now you are ready to start working on your WordPress blog. Just click the login button to get started with WordPress.

Step 8 – Select a free theme to get started (You can change this anytime)
Select a free theme to get started. You can always change this anytime in the future.
Step 9 – Start building your site
Your site might be in a temporary domain if you created a new domain. This is fine and nothing to worry about. It usually takes 2-20 hours for your domain to start reflecting, so for the time being Bluehost provides you a temporary domain so that you can work on your site right away. Once the domain name is active, Bluehost will automatically change the temporary domain name to your domain name.
If you face any problem then you should call the Bluehost support instead of chatting with them as they are quite active on calls and can get your query resolved in a minute. Also, they have access to your account so they can fix the problem for you as well.
Next, click the start building button to start building your site.

Step 10 – Welcome to your blog admin control
Next screen will show you the admin control of your WordPress blog. This is where you will be able to make changes to your blog, create new and awesome posts and everything related to your blog.

I recommend skipping the blue buttons in the middle of the screen (Business and Personal) and instead click “I don’t need help”. You don’t want any data on your blog and want to start fresh.
That’s it! You have a blog of your own. Tomorrow you will learn how to do the initial setup of your blog on WordPress. This will include getting yourself familiar with WordPress dashboard, creating an email list and getting a logo for your blog.